Cari Blog Ini

Senin, 20 Agustus 2012

MENGHUBUNGKAN DAN MENGGUNAKAN LCD SEBAGAI PERIPHERAL PADA MIKROKONTROLER AVR DENGAN AVR STUDIO 5


1.1.      PENGENALAN LCD


Gambar 1. Liquid Crystal Display
(a) Graphical LCD; (b) Character LCD

LCD merupakan singkatan dari Liquid Crystal Display. LCD merupakan alat atau komponen yang digunakan untuk menampilkan berbagai hal secara visual. Ada banyak jenis LCD, namun yang secara umum yang digunakan dalam dunia robotika atau mikrokontroler dapat dikelompokan dalam dua jenis yaitu, character LCD dan graphical LCD. Pada tulisan ini akan yang akan dibahas adalah jenis LCD yang lebih sederhana yaitu character LCD.

Gambar 2. LCD JHD 162A
Hitachi HD44780 adalah salah satu seri character LCD yang umum digunakan dalam dunia mikrokontroler. LCD ini mampu menampilkan karakter dalam ukuran 2 baris yang masing-masing baris terdiri dari 16 kolom. Namun yang akan digunakan dalam arttikel ini adalah LCD seri JHD 162A. LCD seri JHD 162A ini memiliki bentuk yang hampir sama dan memiliki desain yang kompetibel dengan seri HD44780, sehingga dapat berjalan dengan code yang yang sama. Kedua LCD ini memiliki konfigurasi pin yang sama seperti dapat dilihat pada table 1:
Tabel 1. Konfigurasi pin LCD
No.
PIN
NAMA
FUNGSI
1
VSS
Ground (referensi tegangan)
2
VCC
Power (Positive voltage), +5 Volt
3
VEE
Contrast Voltage (tegangan pengatur kontras)
4
RS
Register Select (memilih register):
0 = Instruction Register (mengaktifkan register instruksi)
1 = Data Register (mengaktifkan register penerima data)
5
R/W
Read/Write:
0 = Write mode (LCD bekerja dalam modus menulis)
1 = Read Mode (LCD bekerja pada modus data LCD bisa dibaca)
Umumnya, read mode jarang digunakan sehingga sebagain orang hanya menghubungkan PIN ini pada ground (0 = modus menulis)
6
E
Enable:
0 = Mulai menampung (save/latch) data karakter pada LCD
1 = disable / me-nonaktifkan
7
DB0
                    Data Bit 0 (LSB)
8
DB1
                    Data Bit 1
9
DB2
                    Data Bit 2
10
DB3
                    Data Bit 3
11
DB4
Data Bit 1 / Data Bit 4
12
DB5
Data Bit 2 / Data Bit 5
13
DB6
Data Bit 3 / Data Bit 6
14
DB7
Data Bit 4 / Data Bit 7 (MSB)
15
BPL
Back Plane Light ( tegangan untuk backlight), +5 Volt atau lebih rendah
16
GND
Ground


1.2.      Menghubungkan LCD

Kedua seri character LCD yang disebutkan sebelumnya, dapat beroperasi dengan mode 8 bit maupun mode 4 bit. Mode 8 bit akan menghasilkan proses yang lebih cepat, tetapi memerlukan 8 pin koneksi data pada mikrokontroler. Sedangakan mode 4 bit lebih lambat dibandingkan mode 8 bit, tetapi hanya memerlukan 4 pin untuk mengirimkan data dari mikrokontroler (koneksi data belum termasuk koneksi pengendalian). Namun umumnya kecepatan pengolahan data mode 4 bit sudah cukup memenuhi kebutuhan dan lebih umum digunakan oleh para pecinta mikrokontroler. Oleh karena pada tulisan ini kita akan belajar menghubungkan mikrokontroler dan LCD JHD 162A dengan mode 4 pin.

Gambar 3. Skema penggunaan LCD dengan modus 4 bit.


1.3.      Menggunakan LCD

Sebelum mulai menggunakan alat atau komponen elektronik tertentu biasanya kita akan mencoba untuk mempelajari datasheet dari komponen tersebut, misalnya data sheet dari LCD ini. Tapi untuk menghasilkan proses pembelajaran yang lebih produktif dan efisien, sahabat tidak perlu melakukan hal tersebut. Saya yakin sahabat suka dengan hal yang lebih sederhana.  Peter Fleury telah menyediakan library LCD, yang dapat sahabat unduh di sini. Oleh karena itu sebelum memulai coding dengan AVR Studio 5, sebaiknya sahabat memiliki mengunduh dan meng-extract library tersebut.
Sekarang kita akan memulai dengan membuka AVR Studio 5 dan memulai create new project. Setelah terbuka, pada panel disebelah kanan, sahabat akan menemukan jendela Solution Explorer. Lakukan klik kanan pada nama project di jendela tersebut. kemudian pilih Go to à Add dan kemudian pilih Existing Item. Jendela pencarian akan muncul, dan sahabat tinggal memilih (Add) file lcd.c dan kemudian ulangi langkah diatas untuk memilih file lcd.h. Akhirnya kita dapat melihat kedua file (file c dan file header dari library LCD) tertera pada project kita.

Gambar 4. Menambahkan library LCD pada project di AVR Studio 5
Setelah kita menambahkan library LCD pada project kita, mari lanjutkan dengan mengatur konfigurasi yang sesuai untuk library tersebut, dengan mengikuti langkah-langkah berikut ini:
-   Lakukan double click pada bagian ‘lcd.h’ (pada jendela Solution Explorer), sehingga akan memunculkan tab ‘lcd.h’. Selanjutnya lakukan scroll ke bawah secara perlahan agar kita tidak melewatkan hal-hal yang penting.
-       Pada bagian awal kita akan menemui beberapa teks komentar yang mendeskripsikan tentang library tersebut.
-   Jika kita melakukan scroll ke bawah lagi maka kita akan menemukan bahwa baris yang mendefinisikan nilai XTAL (atau F_CPU). Sesuaikan nilainya dengan nilai clock (F_CPU) yang kita gunakan pada mikrokontroler. Jika nilai ini tidak sesuai maka kita akan mendapatkan waktu delay yang tidak sesuai juga.
-         Scroll lagi ke bawah dan kita akan menemukan baris yang mendefinisikan LCD_IO_MODE. Seperti telah dijelaskan pada deskripsi di bagian awal, LCD_IO_MODE = 0 berarti LCD dalam modus memory mapped. Sedangakan untuk LCD_IO_MODE = 1 berarti LCD dalam modus 4 bit. Pastikan agar LCD_IO_MODE di set dengan nilai 1 (modus 4 bit). Perlu diingat bahwa library ini tidak mendukung modus 8 bit.
-    Setelah bagian LCD_IO_MODE maka kita akan menemukan bagian penting lainnya, yaitu pendefinisian port/pin pada mikrokontroler yang telah dihubungkan dengan LCD. Sesuaikan port dan pin yang anda gunakan. Umumnya, DB4,…,DB7 pada LCD dihubungkan dengan pin D4 hingga D7 pada mikrokontroler. Sedangkan 3 pin pengendali LCD (RE, R/W, E) bebas sesuai keiinginan kita. Sebenarnya, kita bebas mengatur pin yang digunakan, yang terpenting adalah kita mendefinisikan pin-pin tersebut pada bagian ini sesuai dengan keadaan yang sebenarnya.
-      Sahabat telah selesai melakukan proses pengaturan pendefinisian atau pengaturan konfigurasi. Jangan lupa untuk menyimpan (save) semua setting yang telah sahabat lakukan dalam lcd.h ini.
-     Jika kita tetap melakukan scroll lebih lanjut lagi maka kita akan menemukan rangkaian daftar perintah pada LCD yang dapat dijalankan dengan meng-input-kan perintah tersebut pada fungsi lcd_command().
-      Selanjutnya kita juga akan menemukan rangkaian daftar fungsi bersama deskripsinya, yang di definisikan melalui library ini. Fungsi-fungsi tersebut antara lain lcd_init(), lcd_clrscr(), lcd_home(), lcd_gotoxy(), lcd_putc(), lcd_puts(), lcd_puts_p(), lcd_command(), lcd_data() dan lcd_puts_P(). Their description is attached alongwith their declaration.
Terakhir, jangan lupa untuk memasukan (#include) “lcd.h” pada bagian header file c project kita. Sekarang kita sudah siap untuk melakukan coding untuk menampilkan karakter yang kita inginkan pada LCD.
Coding
Mari kita coba menampilkan karakter yang sederhana, sekaligus untuk memeriksa apakah kita telah berhasil menghubungkan LCD dan mikrokontroler kita. Sahabat bisa menggunakan code berikut ini:

Gambar 5. Contoh c code untuk menampilkan karakter sederhana pada LCD
Jika sudah selesai mengetik code diatas, lakukan compile dan build untuk menghasilkan file hex. Lakukan burning/programming/flashing file tersebut ke dalam mikrokontroler sahabat yang sudah terhubung dengan LCD dan lihat apa yang terjadi dengan LCD sahabat. Jika sahabat telah melihat tulisan “Hallo Sahabat” dan “Sky-Institute” pada baris pertama dan baris kedua maka saudara telah berhasil menghubungkan dan menggunakan LCD.
Sekarang mari kita pelajari sesuatu yang lebih, sekaligus mematangkan kemampuan sahabat dalam menggunakan LCD karakter ini.

1.3.1.      Menampilkan karakter/string dinamis

Pada bagian ini kita akan melihat contoh bagaimana menampilkan karakter yang dinamis/bergerak pada LCD kita. Mempelajari bagian ini akan membantu kita untuk lebih mengeksplore dan mengenal library LCD yang kita tambahkan diatas. Bagian ini juga akan membuat kemampuan sahabat semakin bertambah, dan saya yakin hal ini akan memberikan kesenangan dan kepuasan bagi sahabat yang sedang mempelajari pengunaan LCD.
Kali ini kita akam menampilkan tulisan atau karakter yang akan bergerak. Sebagai tips: gunakanlah perintah/fungsi lcd_command() yang telah kita lihat sebelumnya, misalnya lcd_command(LCD_MOVE_DISP_RIGHT) untuk menggerakan karakter ke kanan, lcd_command(LCD_MOVE_DISP_LEFT), dan lain-lain. Kemudian coba buat agar tulisan tersebut dapat berputar bergantian antara baris satu dan baris kedua pada LCD. Sahabat bisa mempelajari lebih jauh menggunakan code berikut ini:

Gambar 6. Contoh c code untuk menampilkan karakter dinamis

1.3.2.      Menampilkan nilai atau angka (integer, float):

Seperti namanya LCD karakter, maka fungsinya pun untuk menampilkan karakter. Namun bagaimana jika sahabat ingin menampilkan data integer, float atau yang lain? Apakah hal tersebut dapat dilakukan? Pada dasarnya yang dapat kita display adalah grafik ataupun karakter. Sedangkan integer dan proses aritmatik hanya bisa terjadi didalam otak. Angka merupakan merupakan representasi karakter dari sebuah data integer, float, dan lain-lain. Oleh karena itu kita dapat menampilkan data integer ataupun hasil operasi aritmatika lainnya, tetapi kita perlu ‘merubah’/merepresentasikan dalam bentuk data karakter (string).
Untuk mengubah data integer menjadi data string kita dapat menggunakan perintah/fungsi itoa(integer_yg_ingin_diubah, representasi_string_nya, basis). Dengan fungsi tersebut kita dapat ‘mengubah’ data integer menjadi data karakter sesuai basis yang diinginkan. Misalnya jika kita ingin mengubah data integer 14 menjadi data string dalam bentuk biner maka basis kita isi dengan 2. Dari pada berpanjang lebar, mari kita lakukan percobaan dengan code berikut ini:

Gambar 7. C code untuk menampilkan data integer

Secara umum, kita tidak disarankan untuk menggunakan perhitungan decimal (float number) dalam melakukan pemrograman mikrokontroler. Hal ini disebabkan karena umumnya inti otak dari mikrokontroler tidak dilengkapi dengan kemampuan untuk melakukan operasi aritmatik dengan bilangan decimal. Yang dapat dilakukan oleh otak dari mikrokontroler adalah melakukan operasi aritmatik. Namun secara engineer hal itu dapat dilakukan dengan mensimulasi (emulate) operasi aritmatik tersebut pada perangkat lunaknya.
Jika sahabat melakukan operasi aritmatik sederhana dan selalu menghasilkan bilangan bulat (integer) maka sahabat tidak perlu khawatir karena mikrokontroler dapat melakukannya dengan mudah. Tetapi jika pecahan atau bilangan desimal (float) tidak dapat dihindari maka sahabat perlu menggunakan perintah sprintf(). Seperti yang telah disebutkan diatas bahwa untuk melakukan operasi aritmatik bilangan decimal maka kita perlu menambahkan semacam emulator pada mikrokontroler kita. Fungsi sprintf() umum digunakan, tetapi membutuhkan waktu dan memori yang lebih banyak dibandingkan operasi aritmatik sederhana. Oleh karena itu sedapat mungkin sabahat menggunakan perhitungan yang sederhana.
Terkadang kita tidak dapat menghindar dari operasi aritmatik bilangan desimal. Pilihan lain adalah dengan menggunakan perintah/fungsi seperti dtostre() atau dtostrf(), karen fungsi-fungsi tersebut memiliki library yang lebih sederhana dan ringan dibandingkan perintah sprintf(). Atau kita juga dapat menggunakan perintah rprintfFloat(jmlhdigit, double_or_float) yang terdapat pada library AVR (rprintf.h). 
Sekarang mari kita coba menampilkan data float ke dalam LCD, misalnya data tekanan udara.

Gambar 8. C code untuk menampilkan data float/double
Setelah sahabat memprogram mikrokontroler sahabat dengan code diatas, apakah yang terjadi? Apakah yang muncul di LCD hanya ‘tanda tanya’ (?) seperti gambar dibawah ini?
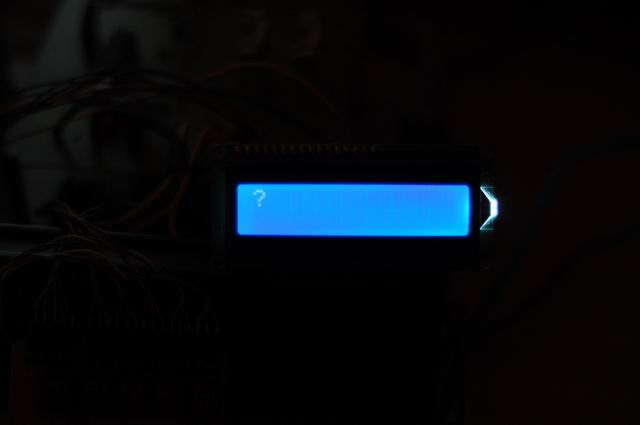
Gambar 9. Error saat menampikan data float pada LCD
Masih ingat kan dengan penjelasan diatas bahwa, untuk melakukan operasi dengan data float, mikrokontroler membutuhkan ‘emulator’. Nah, kita perlu menjalankan ‘emulator’ tersebut agar operasi berjalan lancar, dengan cara memberitahukan kepada linker agar menggunakan floating point library. Library ini umumnya sudah tersedia dalam software AVR studio 5, tetapi perlu kita set agar library tersebut dapat digunakan. Library yang perlu ditambahkan adalah libprintf_flt.a dan libm.a, dan kita juga perlu menambahkan -Wl,-u,vfprintf -lprintf_flt –lm pada linker option agar library diatas dapat dijalankan dengan benar.
Berikut ini adalah cara memberitahukan linker pada AVR studio 5 mengenai floating point library:
-          Pada bagian menu klik Project (ALT+F7)
-          Klik Toolchain dan lihat pada bagian AVR/GNU C Linker dan pilih Libraries.
-          Pada bagian Librarier (-Wl,-l), lakukan klik pada tombol Add, dan sebuah jendela akan terbuka. Ketikkan (insert) libprintf_flt.a. Pilih Ok dan ulangi dari tombol Add dan ketikkan libm.a.
-          Lanjutkan dengan mengklik bagian Miscellaneous pada bagian AVR/GNU C Linker dan ketikkan -Wl,-u,vfprintf -lprintf_flt –lm pada baris input disamping tulisan Other linker flags.
-         Lakukan save, kemudian rebuild file C project sahabat.
Program kembali mikrokontroler sahabat dengan file hex yang baru, maka sahabat akan mendapatkan tampilan pada LCD seperti yang diharapkan.
Catatan:  bagi sahabat yang masih menggunakan CV AVR, sahabat dapat melakukan langkah diatas dengan melakukan klik pada Project à Configure, kemudian pada bagian (s)printf feature ubah statusnya menjadi float, width, precision.

Kesalahan (error) yang Sering Terjadi dan Solusinya
Saat menggunakan LCD mungkin sahabat akan menemui beberapa masalah seperti berikut:
-          tidak ada yang terlihat di layar
-          layar tampak hitam semuanya
-          hanya tampak kursor yang berkedip, dan tidak nampak karakter yang diinginkan
-          tampak karakter atau simbol yang aneh
Untuk masalah-masalah tersebut coba selasaikan dengan langkah-langkah berikut:
ü  Atur resistor variabel (potensiometer) untuk meningkatkan kontras
ü  Periksa kembali sambungan, mungkin ada koneksi yang putus atau mengalami short sircuit.
ü  Periksa kembali code sahabat. Pastikan sahabat telah menggunakan nilai clock (XTAL/F_CPU) yang tepat pada project utama maupun pada library lcd.h.
ü  Terakhir, jangan lupa bertanya kepada orang lain, karena mungkin mereka pernah mangalami masalah yang sahabat hadapi, dan mereka telah berhasil menemukan solusinya. Sahabat juga dapat bertanya di blog ini melalui jendela comment.


BIBLIOGRAPHY


dl8dtl. (2006, June 30). How to use sprintf with floats in AVR STUDIO (winavr compile). Retrieved August 14, 2012, from www.avrfreaks.net: http://www.avrfreaks.net/index.php?name=PNphpBB2&file=viewtopic&t=39892
Motisan, R. (2012, February 8). AVR Studio 5 snprintf / vsnprintf problem with Floats. Retrieved August 14, 2012, from POCKET MAGIC: Where Technology meets Magic: http://www.pocketmagic.net/?p=2513
Rudiawan, E. (2012, March 19). ngooprek.com. Retrieved August 14, 2012, from Belajar AVR – Sensor Interfacing – 13: http://ngooprek.com/blog/2012/03/19/belajar-avr-sensor-interfacing-13/
Vitu, M. (2011, June 16). LCD Interfacing with AVR. Retrieved August 14, 2012, from maxEmbedded: a Guide to Robotics and Embedded Electronics: http://maxembedded.wordpress.com/2011/06/16/lcd-interfacing-with-avr/
winavr.scienceprog.com. (2007, January 19). Using sprintf function for float numbers in AVR-GCC. Retrieved August 14, 2012, from AVR-GCC Tutorial WINAVR: http://winavr.scienceprog.com/comment/28 


Sabtu, 21 April 2012

ELECTRICITY – GOD’s Finger to Holds the World


1.1. The Beauty of Electricity

“Electricity and magnetism is all around us. We have electric lights, Electric clocks. We have microphones, calculators, televisions, VCRs, radio, computers. Light itself is an electromagnetic phenomenon as radio waves are. The colors of the rainbow in the blue sky are there because of electricity. Cars, planes, trains can only run because of electricity. Horses need electricity because muscle contractions require electricity. Your nerve system is driven by electricity. Atoms, molecule, all chemical reactions exist because of electricity.
You could not see without electricity. Your heart would not beat without electricity. And you could not even think without electricity, though I realize that even with electricity some of you may have a problem with that.“ [Walter Lewin]

1.2. Modern model of atom


Figure 1.1 – Modern Picture of Atom

Table 1.1 - Property of an atom

Neutron
Proton
Electron
Diameter size (m)

1.2×10⁻¹⁵
5×10-11 to 5×10⁻¹⁰
Mass (kg)
1.675×10⁻²⁷
1.673×10⁻²⁷
9.109×10⁻³¹

1.3. History of electricity

Electron, name from a Greek word, means amber. As reported by the ancient Greek philosopher Thales of Miletus around 600 BC, it was known that if we rub amber that it can attract light objects such as pieces of dry leaves and hair. So that's where electricity got its name from.
In the sev-sixteenth century there were more substances known to do this, for instance glass and sulfur. And it was also known and written that when people were bored at parties that the women would rub their amber jewelry and would touch frogs. The frogs would start jumping of desperation, which people considered to be fun, but they not understanding what actually was happening to the amber nor what was happening to the frogs.
In 1733, C. F. du Fay proposed two varieties of electricity that cancel each other, and expressed this in terms of a two-fluid theory. When glass was rubbed with silk, du Fay said that the glass was charged with vitreous electricity, and, when amber was rubbed with fur, the amber was said to be charged with resinous electricity. Let's call one A and the other B. It was known that A repels A and B repels B but A attracts B.
Still in the eighteenth century, it was Benjamin Franklin without any knowledge of electrons and protons who introduced the idea that all substances are penetrated with what he called electric fluid, electric fire. And he stated if we get too much of the fire then we are positively charged and if we have a deficiency of that fire, then we are negatively charged. He introduced the sign convention and he decided that if we rub glass that that is an excess of fire and he called that therefore positive.
We will see later that why this choice he had fifty percent chance is extremely unfortunate but we have to live with it. So if we take this fluid according to Benjamin Franklin and bring it from one substance to the other, then the one that gets an excess becomes positively charged. Automatically as a consequence of that the one - from which we take the fluid - becomes negatively charged.

1.4. Electric charge

Charge is an intrinsic property of partikel or matter. Charge have been quantized and comes in multiples of individual small units called the elementary charge, e, approximately equal to 1.602×10⁻¹⁹ Coulombs. The proton has a charge of e, and the electron has a charge of –e.
A neutral atom has same number of electron and proton, so the charge is 0. If we take one electron off, the atom will become a positive ion. If we add an electron then, the atom will become a negative ion. Remember, we can't add or taking off a proton from an atom.
The electric charge is a fundamental conserved property of some subatomic particles. This is the same as the idea of Benjamin Franklin. We can't create charge. If we create plus then we automatically create minus.

1.4.1. Electric charging

The question is “how can we manipulate or engineering the electricity?”
That because we are able to separate positive and negative charge from each other. This process called charging and there are three methods to do that.

1.4.1.1.   Friction

From the history above, people has been known that friction can produce positive and negative charge. Charging by friction can happen since the two objects are made of different materials, so their atoms bounded their electrons with different strengths. As they pass over each other the electrons with weaker bonds are “ripped” off of that material and collect on the other material.

1.4.1.2.   Conduction

Charging by conduction is also called by contact. The principle is when we contact a neutral material with a charged material, the electron will be transfered and neutral material will become a charge material. But even if the material not make a contact and just close enough to let the electron jump from one material to another material, that is also conduction
With conduction we will get the same type of charge. So, If we conduct with positive charged, we will get a positive material. And if we conduct with negative charge we will get a negative material.

1.4.1.3.   Induction

We can also charging a material without contact or transfer of electron. This prosses called induction. As in conduction, type of material will determine the behavior of induction.

1.4.2. Electric charge behavior

As we know before, same type of charge will repel each other, and different type of charge will attract each other. But, do you know, what it is that makes us easy to charging or not?? The answer is the type of material. There are two type of material based on it’s electrical property.

1.4.2.1.   Conductor

Conductor materials have moveble electrons, so, it is easy for the electron to move from one atom to another atom. Electrons of conductor material will move when an electric potential difference (measured in volts) is applied across separate points on the material.
Because of easy movement electron, it is easy to charging the conductor material by conduction method. The opposite, it is more complex process to charging the conductor material with induction method.

Figure 1.2 – Conduction and induction of conductor material

1.4.2.2.    Insulator or non-conductor

The electrons of insulator material are tightly bound and localized in direction of chemical bounding. So, it is hard for the electron to move from one atom to another atom. Perferct insulator does not respond to an electric field and completely resists the flow of electric charge. But in real, there is no perfect insulator, so almost of the material are semiconductor material.
In practice, the insulator can be polarized by an applied electric field, and it called dielectric material. When a dielectric is placed in an electric field, electric charges do not flow through the material as they do in a conductor, but only slightly shift from their average equilibrium positions causing dielectric polarization. Therefore, dielectric materials with high dielectric constants (not easy to polarized) such as glass, paper or Teflon are considered as good electrical insulators.
Dielectric property makes easy to charging non conductor material by induction method. Rather than that, it is more complex process to charging the insulator material with conduction method due to only the specific areas that actually touched would show any change in charge.

Figure 1.3 – Conduction and induction of insulator material

1.4.2.3.    Spark phenomenon

An electric spark is a type of electrostatic discharge that occurs when an electric field with strength exceeds the dielectric field strength of air. This exceeded field strength causes an increase in the number of free electrons and ions in the air and temporarily causing the air to become an ionized electrically conductive channel. This process producing a brief emission of light and sound, and that usually we call spark.
Electric sparks occur in or near many man-made objects. Some of them are small and some of them are large. Sometimes it can happen by accident, and sometime it is by design. Lightning is an example of an electric spark in nature. A continuous discharge of electric current through a gas is an electric arc.

1.4.3. Conservation of charge

The total electric charge of an isolated system remains constant regardless of changes within the system itself. Charge cannot be created. If we create plus then automatically we create minus. This law is inherent to all processes known to physics and can be derived in a local form from gauge invariance of the wave function. The conservation of charge results in the charge-current continuity equation. More generally, the net change in charge density ρ within a volume of integration V is equal to the area integral over the current density J through the closed surface S = ∂V, which is in turn equal to the net current I:


Thus, the conservation of electric charge, as expressed by the continuity equation, gives the result:


The charge transferred between times ti and tf is obtained by integrating both sides:


where I is the net outward current through a closed surface and Q is the electric charge contained within the volume defined by the surface.

1.4.4. Electroscope - a principle to measure charge

We will use various instruments to measure charge in a quantitative way and one of the instruments that is very simple, is called an electroscope. In general it is just a conducting rod (such as aluminum, metal) with two pieces of tinsel at the end. The pieces of tinsel usually from aluminum foil. And often there is a nice knob, so if we touch or bring near enough to knob with a charged object, then because the rod is conductor, this can conduct the charges.
If we touch it with an object which is positively charged, then this electroscop will become positively charged. If I touch it with an object which is negatively charged it will become negatively charged. If we induce the knob with positive charged, the knob will become negative charged and the the pieces of tinsel will become positive charged. At the end, we will see that the two very light pieces of aluminum foil will repel each other and shows a certain angle, and the more charge there is the larger that angle.

Figure 1.4 – Electroscope and example of measurement

1.5. Electric force

It was Charles Augustin de Coulomb, French physicist, who did a lot of research on this in the nineteenth, eighteenth century actually. He found a special relationship between two charges. It was first published in 1785 and was essential to the development of the theory of electromagnetism. Before it was published, other researchers have been insights into aspects of Coulomb's law. In 1767, Joseph Priestley of England conjectured that the force between charges varied as the inverse square of the distance.
Coulomb's law or Coulomb's inverse-square law is a law of physics describing the electrostatic interaction between electrically charged particles. Coulomb found that the force is proportional to the product of the two charges, times a constant, which nowadays we call Coulomb's constant, K, and then divided by the distance between these charges squared.
Now let's try a little bit more quantitative. If we take two charges and we use for charges the symbol q1 and q2. They are separated by a distance, r, and the unit vector in the direction from one to two that we called r roof 1,2. (The roof stands for unit vector). If these charges are equal, both minus or both plus, then charges will repel each other. The F1,2 is the force on two due to number one. Since action equals to minus reaction, force F2,1 is equal to F1,2 in magnitude but a hundred eighty degrees, or it is in opposite direction.


Figure 1.5 – Electric force between two charges


Where:
q= charge [Coulomb]
r = distance [m]
K= coulomb’s contant = 8.987551787 × 10⁹ [Nm2/Coulomb2] = 


1.5.1. Superposition

If there is three or more charge, we can use the superposition principal. In other time we will discuss about that.

1.5.2. Electricity force vs gravitational force vs nuclear force

Look at what Joseph Priestley found and see equation (1-1), I suddenly remember to the Newton law’s of gravitation.

Figure 1.6 – Gravitational force between two mass


Where:
m = mass [kg]
r   = distance [m]
G = gravitational contant [Nm2/kg2] = 6.674 × 10⁻¹¹ [Nm2/coulomb2]

And if we compare electricity & magnetism with mechanical, thereby comparing electricity with gravity, we will see that electric forces are way more powerful than gravitational force. Let’s see that is by taking two protons which are a distance D apart. As they have the same charged, they will repel each other, because of electric force. Remember of Table 1.1, we know that the proton have mass. Because gravity always attract each other, so it will become force that opposite to the electric. Now, the question is “which one is more powerfull?”


Figure 1.7 – Example of force acting on protons


To answer the question, let’s use equation (1-4) and equation (1-5) with the data from Tabel 1.1:


From the result above, we found that the electric force is thirty-six orders of magnitude more potent than the gravitational attraction. If these were the only forces that acted on the protons and you bring them in the nucleus, which has a size of only ten to the minus fourteen meters, then the acceleration that the proton will experience is the electric force divided by the mass of the proton. If there is two protons in an atom, then the electric force that repel the protons each other have ratio about twenty-six order of magnitude higher than the gravitational acceleration on earth.
As we know the gravitational attraction is thirty-six order of magnitude lower than repelled of electric force, ‘what kind of force that holds nucleus together?’ There must be such a tremendous force on these protons. Well, the answer is the nuclear forces that holding them together. We will not discuss about nuclear force on this topic, so, just leave it alone for now.
So what holds our world together? Well …. :
i)        On the nucleus scale (about 10-14m), nuclear force are very important.
ii)       On an atomic scale up to thousands of kilometers, it's electric forces that hold our world together.
iii)     But on a much larger scale, planets and stars and the galaxy, it is gravity that dictate the behavior of the universe.
After we know about that, we may say, “That's very inconsistent with what we have learned in Figure 1.7!” Yes, however, most objects are neutral or very close to neutral and so if you take the earth it is very unlikely even that the earth as a whole would have a charge of more than ten coulombs (that probably is already an exaggeration). So, if we put the earth with ten coulombs and then we put minus ten coulombs, so they will attract each other, but given their distance, it's almost nothing. The electric force on that scale is negligibly small. But of course, at that scale, the force of gravity wins, because of their massive masses.
In this particular case, which we take the earth and the moon, the gravitational force wins over the electric force by twenty-five orders of magnitude. So even though our immediate surroundings are dominated by electric forces, including our own body for that matter, the behavior of the universe on a large scale is dictated by gravity.


Bibliography


Charging. (n.d.). Retrieved April 17, 2012, from www.studyphysics.ca: http://www.studyphysics.ca/30/charging.pdf
Conductors Insulators and Induced Charged. (n.d.). Retrieved April 17, 2012, from physics.unl.edu: http://physics.unl.edu/~cbinek/Unit_2%20conductors%20insulators%20and%20induced%20charges.pptx
Coulomb's law. (n.d.). Retrieved April 19, 2012, from en.wikipedia.org: http://en.wikipedia.org/wiki/Coulomb%27s_law
Dielectric. (n.d.). Retrieved April 19, 2012, from en.wikipedia.org: http://en.wikipedia.org/wiki/Dielectric
Electric charge. (n.d.). Retrieved April 16, 2012, from en.wikipedia.org: http://en.wikipedia.org/wiki/Electric_charge
Electric Spark. (n.d.). Retrieved April 17, 2012, from en.wikipedia.org: http://en.wikipedia.org/wiki/Electric_spark
Electrical conductor. (n.d.). Retrieved April 17, 2012, from en.wikipedia.org: http://en.wikipedia.org/wiki/Electrical_conductor
Ganderton. (n.d.). What is the charge and location and mass of a proton and a neutron and an electron in the atom? (JEK, Editor) Retrieved April 15, 2012, from wiki.answers.com: http://wiki.answers.com/Q/What_is_the_charge_and_location_and_mass_of_a_proton_and_a_neutron_and_an_electron_in_the_atom
Insulator (electricity). (n.d.). Retrieved April 17, 2012, from en.wikipedia.org: http://en.wikipedia.org/wiki/Electrical_insulation
Newton's law of universal gravitation. (n.d.). Retrieved April 19, 2012, from en.wikipedia.org: http://en.wikipedia.org/wiki/Newton%27s_law_of_universal_gravitation
Lewin, Walter, 8.02 Electricity and Magnetism, Spring 2002 (Massachusetts Institute of Technology: MIT OpenCourseWare). http://ocw.mit.edu (accessed April 19, 2012). License: Creative Commons Attribution-Noncommercial-Share Alike.


********THANK to GOD*******